How do you use self-adhesive insulating tape?
It is not uncommon to have a slightly damaged electrical cable; maybe the external sheath is torn, to the point perhaps to reveal the internal wires. Accidents of this kind can happen for different reasons.
For example, an extension cord can be placed on the ground inside an apartment, and there might be a door that, because of a sudden draught, closes with a slam, “biting” at the electrical cable.
Or again, very often in a construction site it’s easy to pull a cable from one side to the other, ending up with it, perhaps, getting caught on an iron rod sticking out of reinforced concrete, or on a sharp edge.
And if it is true that damaging the sheath of a cable is anything but difficult, it is also true that these damages should not be underestimated.
They could compromise not only the efficiency and functionality of the cable itself, but also the safety of those who work with or around it, especially in hum environments. Sometimes the damage is only slight, and the cables are not exposed.
Other times it is more marked, but without affecting the cables’ core. Other times you have to deal with true holes or with deep cuts that also affect the cores of the cables: in the latter case it’s best to replace the cable directly, or to create a new splice.
In order to fix a damaged cable externally, in any case, two tools are most commonly used: on the one hand, common insulating tape, on the other, self-adhesive insulating tape. But what is self-adhesive insulating tape?
What is self-adhesive insulating tape?
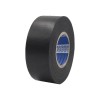
Self-adhesive insulating tape, also called vulcanizing tape, is a specific and very particular kind of insulating tape, for a more specialized use. In fact, we are talking about a type of insulating tape with decidedly reduced adhesion, which at first glance looks like double-sided adhesive tape.
That’s right: the binding tape has a liner, a protective film which must be removed before use.
Due to these properties, vulcanizing insulation tape is used for the most delicate repairs of electrical cables, for example for repairs that must last a long time, or for cables that can have to withstand weather or moisture, and therefore need something stronger than ordinary electrical tape.
But what are the specific differences between insulating tape and self-adhesive adhesive tape?
The difference between vulcanizing insulating tape and regular insulating tape
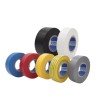
On the one hand, as mentioned, there is insulating tape as we all know it. It is a roll of adhesive tape without any film, with one adhesive surface and the other being completely smooth, often colourful.
Insulating tape is called in this way because it is characterized by an extremely low conductivity, which makes it able to insulate electrical wires despite its extremely low thickness.
On the other hand, self-adhesive tape can be seen as a peculiar and stronger type of insulating tape.
Compared to the regular type, it has a longer lifespan: if, in fact, common insulating tape relies on a glue that, over the years, can lose its adhesive power, self-adhesive tape grips cables thanks to its specific application style, which does not rely as much on glue as it does on its elasticity, which leads to the tape becoming one with the external surface of the cable.
So, let’s have a look at how to use the self-adhesive tape effectively and correctly!
How to use self-adhesive tape
Using self-adhesive adhesive tape is simple and easy to explain.
Let’s imagine you have an externally damaged electrical cable in front of you. You can take the vulcanizing tape and cut a short piece: having a very elastic support, it will be enough to cut about 10-12 cm (3.9, 4.7 in) for a damaged area measuring less than 2 cm (0.7 in).
Once you have done this, you can remove the liner, the film protecting the tape. The second step is to “heat up” the tape, stretching it slightly.
At this point you can begin the repair, first wrapping it once around itself, 2 cm (0.7 in) away from the damaged part of the wire, and then, with partially overlapped layers, go on to cover and overlay the tape over the damaged area.
The important thing, to effectively use self-adhesive tape, is to press down the tape you have already applied with your left hand, continuing to pull and stretch the tape before each wrapped layer. At the end, when you have used up your piece of tape, make a double layer again, to fasten it in place.
The trick is to make sure there is a sufficient number of layers to ensure insulation and grip, but making sure not to go beyond what is necessary, to avoid compromising the flexibility of the cable itself.
A repair carried out this way will last a long time, even when exposed to moisture.